Vintage Mustang Forums banner

What 67 68 bezel did\can you use for 5 inch Autometers guages

3.9K views 7 replies 6 participants last post by  67 460Stang  
#1 ·
I've been able to find some dated info on building a custom gauge cluster for my 67. I was wondering if fitting aftermarket gauges into a 67\68 gauge bezel has gotten any easier?

I've see the same guides that everyone else has used\reference:
Buiding a Better Bezel
Gauges Mod

I've also found Classic Instruments's bezel that fits aftermarket gauges, but I don't believe their bezel will accept a 5" speedo and tach, only 3 3/8".

Searching around I also found Scott Drake has a custom Bezel as well for aftermarket gauges, designed for the desired combo of 2 5/8" and 5" gauges. However, it appears that theses bezels are designed for the gauges to fit in from the front, not from behind like JME, edbert, and Reenmachine's.

I really like the look of the Ultra-Lite II gauges, and have entertained the idea of having Mustang Depot build a set, but these gauges are so expensive, I figure I could save a few bucks if I did this my self.

Any recommendations\suggestions? I've also found "Mustangs to Fear" is manufacturing their own bezel, does anyone know if it'll work?

What are you guys doing for yourself?

Thanks,
 
#3 ·
On my 68 I put the the 5 inch gauges in from the back and the small ones from the front.
I modified the stock bezel and made my own support plate.


#4 · (Edited)
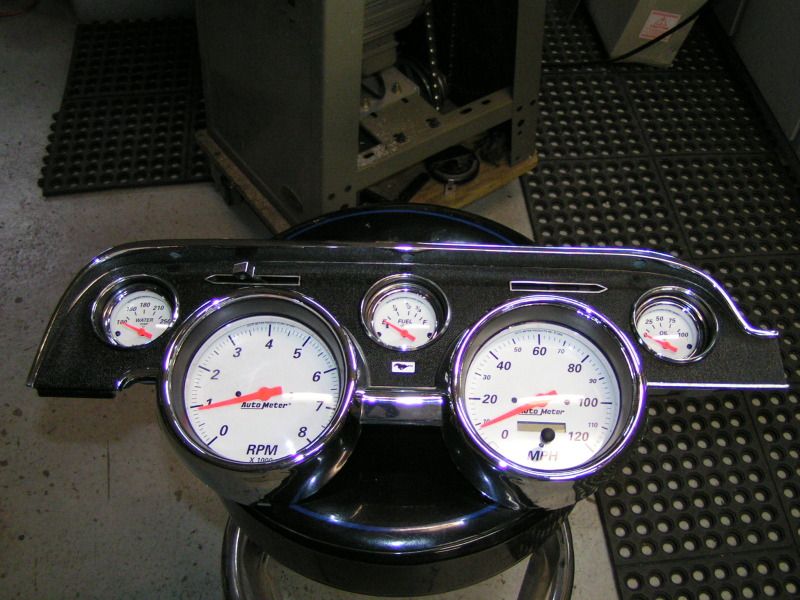
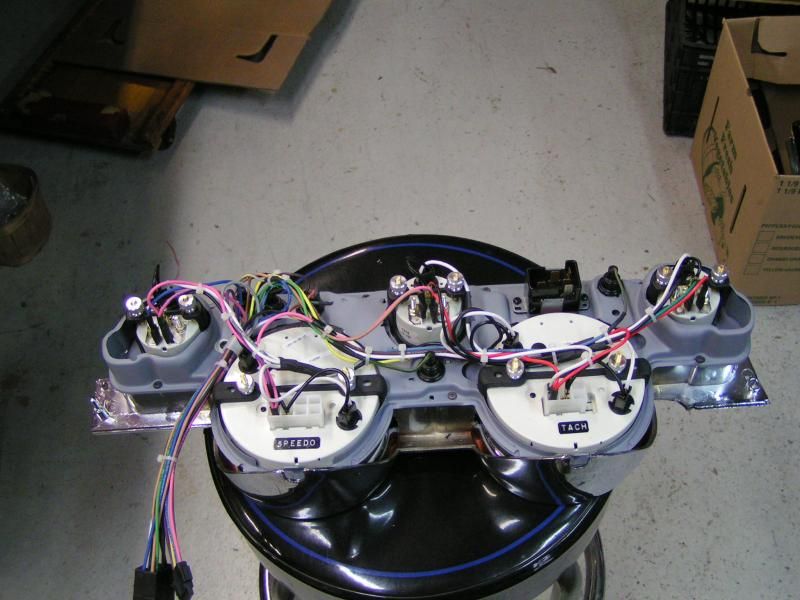
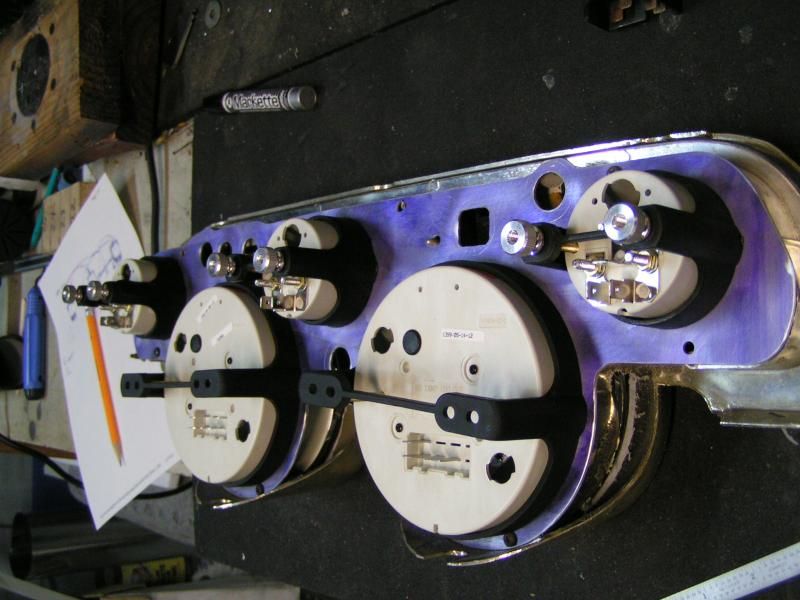
I literally just did this a couple of weekends ago using the desired 5" and 2 5/8" Automoter Pro-Comp guages. I followed the "Gauges Mod" link you have in your first post. I used a regular new Scott Drake bezel.

It's not a difficult thing to pull off, but you just need time, patience, a dremel tool, and some cut-off wheels for the dremel. Did I mention time and patience?

I purchased the resin "aftermarket gauge backing plate" from NPD but never used it, as I found that it required almost as much modding as just cutting up the original metal backing plate.

I don't think there is yet an "easier" way to do all of this, unless you want to just stick 3 3/8 and 2 1/8 gauges in from the front, which is a look I didn't want.

To my amazement, everything worked correctly the very first time I plugged it all in. Again, time and patience.

(FYI - I hooked up my line lock to trigger the red "Brake" light on the dash. I've heard others use the same "Brake" light as a shift light off of their tach, which is also a neat idea).

Image
 
#5 ·
kechke - That's some nice work that you have done, hidden behind those gauges. I really like how clean it looks and how to used acctual autometer gauge retainers. I saw in one of your other post how you milled and clearance the bezel for the gauges....I wish I had access to those tools and the skill to properly use them.

Rorin67, yours look great too. Thanks for the warning on patience with respect to modifying the bezel for aftermarket gauges. I find that "patience" is usually not something I have much of. However, you and kechke have just confirmed what direction I need to pursue. I was hoping that one of the aftermarket guys would have come up with bezel that was already clearanced for big aftermarket gauges. I know Scott Drake and MTF have bezels that install/drop in from the front, retaining the bezels on the individuals gauges, but that is not the look I want for the car. I have a two old bezels I can practice cutting on, before tackling a new bezel.

Thanks for the input guys.
 
#6 · (Edited)
Thanks Tommy. I was lucky to have those machines to make the job easier for me , but, the very same results are achievable with a lot of patience and a Dremel tool/
Just take your time and cut a bit at a time to get the proper fit of each step to get the gauges to fit. Your idea of practicing on a old unusable bezel ( there are tons of them around ) before you tackle the bezel you want to use is a great idea..
An old timer once encouraged me to tackle what seemed to be an unsurmountable task with the following statement;
" by sitting there wringing your hands looking at the job will never get it done, the first step is to get at it you will see the progress you want"

Get one of the flimsy plastic gauge supports and use it as a pattern to make a sturdy aluminum one, it can all be done with an inexpensive hand nibbler and a couple of files.
I'm sure you can do it Tommy, take that first step.
 
#7 ·
i got speedhut gauges. 2-1/16" which mount from the front easy.
i got 4-1/2" speedo and tach gauges that will mount from the back. since these gauges are shallow, they dont require a lot of cutting on the instrument housing.
i picked up used instrument cluster at swap meet for $10.
after picing autometer gauges and estimating spending $400 plus on gauges i opted for speedhut and got they customized without the speedhut name on the bottom.
i also got a new bezel to fit these gauges so i dont have to fuss with removing the old unit still in the car.
i also got a digital speedo unit to replace the current cable setup.
i'm not really a fan of the LED, but i like to have more accurate gauges that fit in factory locations and look time period.