Vintage Mustang Forums banner

11 Years Later, Project Albatross Build Thread...

25K views 77 replies 27 participants last post by  m ichaelD  
#1 ·
I should have done this from the beginning, but better late than never, I hope.

As many of you have seen in my posts of the past years, I've been workiong on a 65 fastback. It was pretty rusty and "only" a straight 6. Why should it be saved? Well it's kind of a family heirloom.
Image


Here is the video the above was taken from, I'm the little one in the cap.


This car was purchased new for my mother by my father in 1965. It has been in the family all this time. I went over the car in 1979-81, and did the best I could with it as a 16-18 year old with no garage, or prior automotive experience. Most of the major work was farmed out, including the engine rebuild and the paint. I did the complete interior myself, with direction from my late grandfather, who was an experienced upholsterer. I still have the hog ring pliers he gave me, and I intend to use them again...

The car after the first "restoration" in the same spot, but shot from a different angle in 1981.

Image


The car was never in a garage until I took it to my first house in 1992, when it was towed there, It had not moved since 1987. It was in pretty bad shape.

I moved to my new house in 1999. Many of the choices made on the house were related to the old 65 and the automotive interests it spawned. Basically I bought a garage with a house attached.

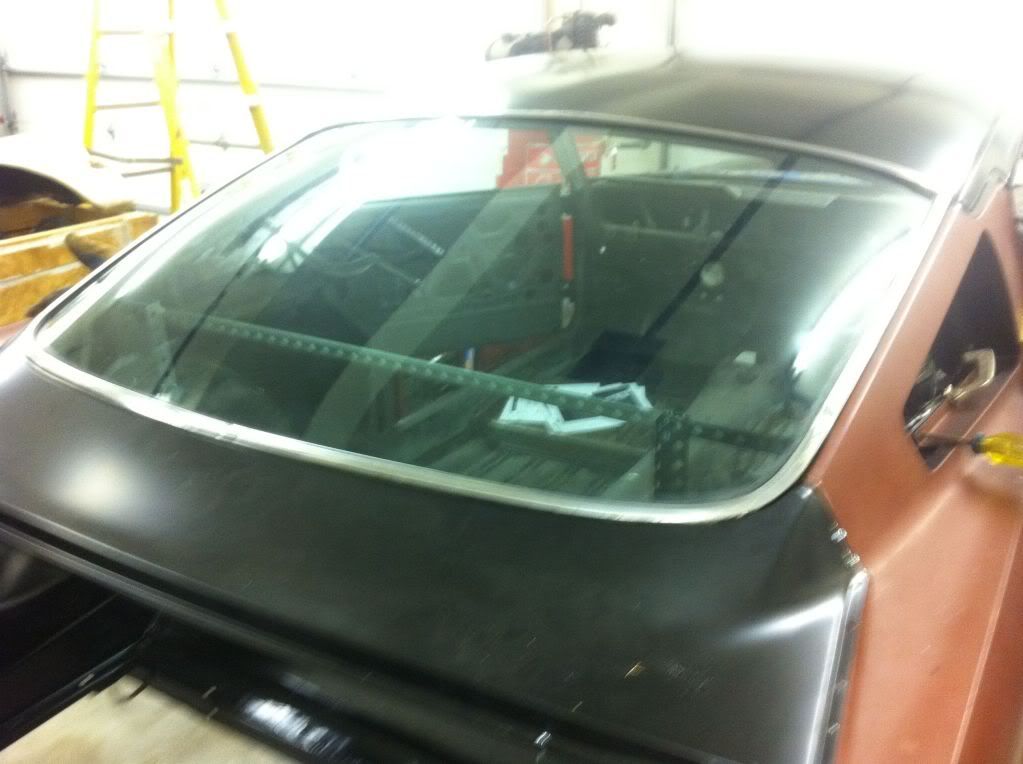
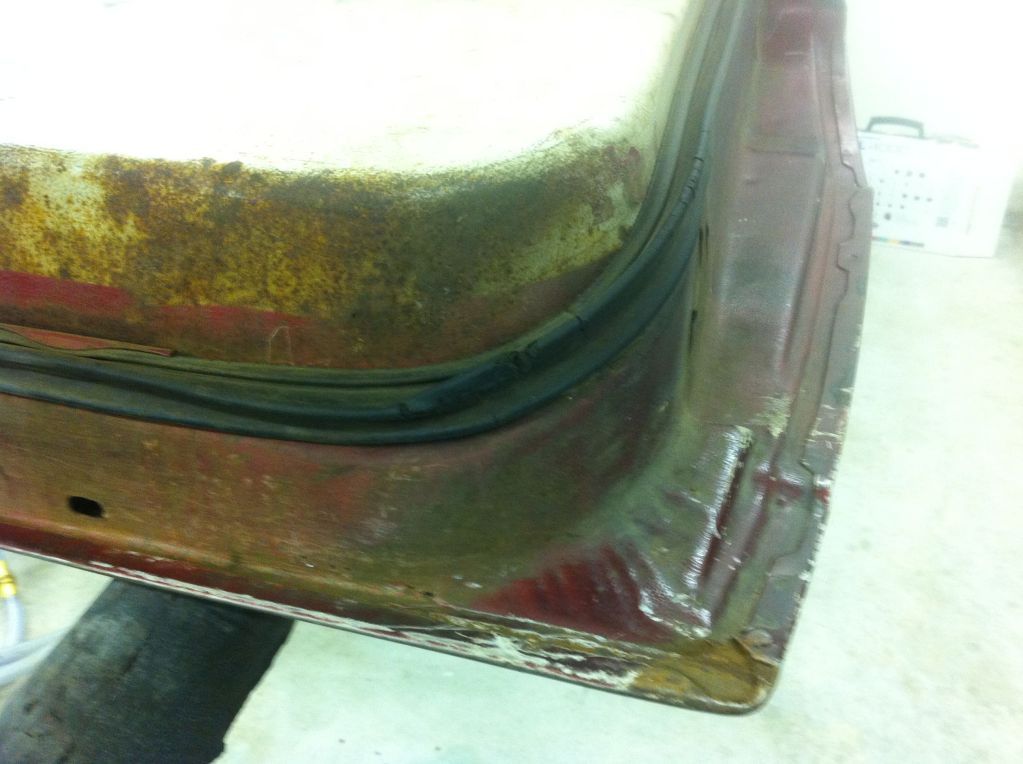
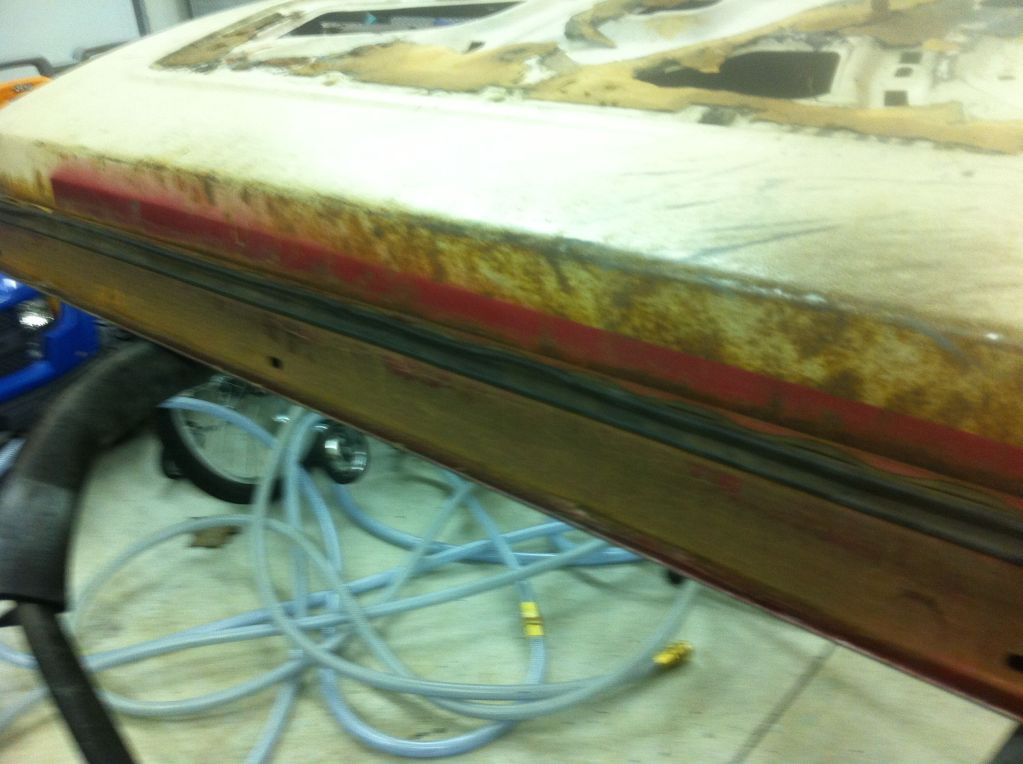
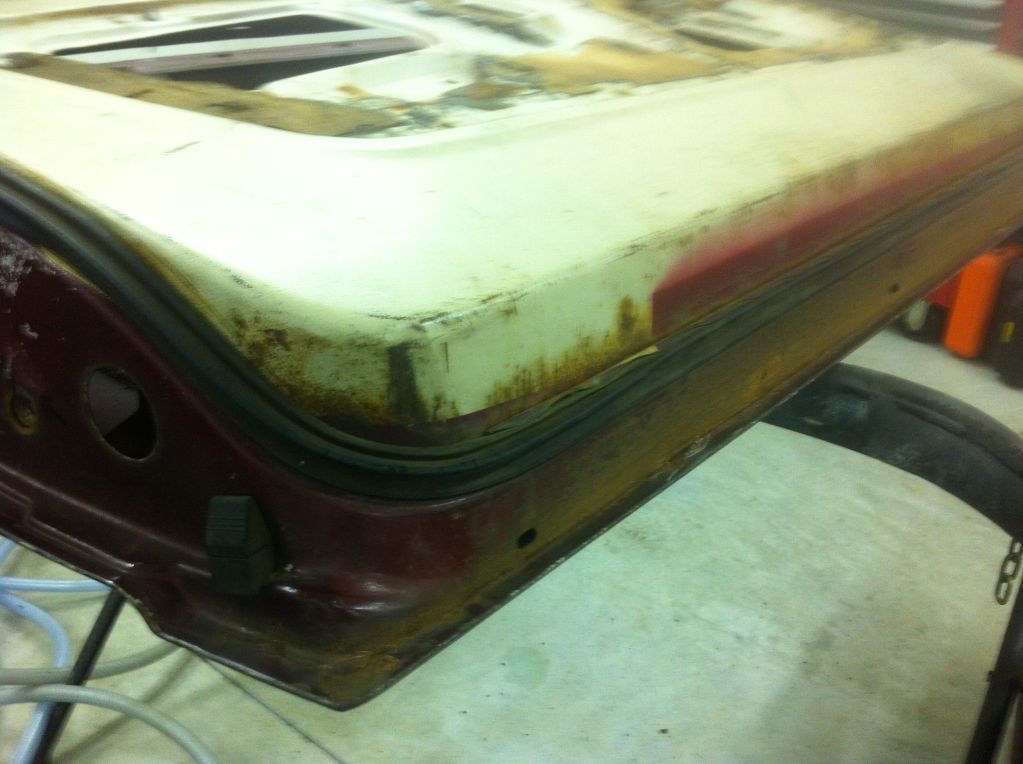
It took from October of 1999 until spring 2001 to get the garage ready for the restoration. I had a direct vent gas heater installed. I installed 16 2 bulb 4ft flourescent fixtures. I wanted to see what I was doing. The lights took 250 feet of wire to hook up ! I installed other little things like an 80 gallon vertical tank compressor, a hose bib( water), lots of air outlets, had the garage painted etc. I moved the car into position on Mothers day 2001 and started work.
Image

Image

Image

Image

Image

Image

Image

Image

Image

Image

Image

Image


More to come...
 
#31 ·
I used the data from the shop manual to set up a datum line. This is where I found out the dimension for the height of the back of the rear frame rails was incorrect. It took awhile for me to believe that. There is a thread here somewhere started on the subject, along with several others.


#40 ·
I'm filling this build thread in years later, so I have some pictures out of order. When I moved to the PS side i noticed a little bubble over where the right door striker would be, dug into it a little bit...

Ouch!

Cut off the outer skin to get at it.


Had to patch the inner skin


And the outer:


#41 · (Edited)
It was time to start fitting the NOS 1/4s and the rest of the back end. The 1/4s I found on this forum back in 2000. I drove to Muscatine IA (935 miles each way) to pick up from a member, who I think his name is Mel.


Stripped of their original red oxide, which maybe I should have left it because lead makes paint stick real good, lol


A coat of SPI epoxy

 
#44 ·
I hear a common refrain that these cars didn't fit together too good when they were new, as an excuse as to why repro parts don't fit.

I had never found that to be true as it seemed NOS parts always dropped right on.

But, it finally did happen, two Ford parts that didn't line up. The NOS 1/4s didn't fit the original 1/4 extensions.


Since I follow 22GTs advice and don't throw out anything,


I verified what was going on with the old 1/4s before I started cutting the welds on the new 1/4s. Sure enough the extensions did fit the original 1/4s perfectly.

Original 1/4, well part of it


and the extension


#45 ·
After much test fitting, measuring, and help from someone who used to post here, Skitzo's measurements, I got the back end lined up with just sheet metal screws.

The window opening was tough, I had to line up the old roof, remeasure the front window opening, then line up the new roof to leave the same opening, then line up the rear window to deck lid transition pan to leave the right opening for the rear window.

The repro deck lid to window panel has a different shape in the window channel. the back is not at 90 degrees, but is sloped leaving less room for the seal. I wanted to make sure weather strip would fit.


I actually installed the window, pulled the string and all. Gaps looked ok, but i still wasn't sure it was right
Image


Image


My old window molding was dented up. before it went obsolete, I bought som NOS replacements. I dug the old ones out for a test fit. I don't actually have the clips in the opening so the molding wouldn't stay down in spots, but it looks like it would with the clips. Anyone know if i could get the old ones straightened?

Image

Image


This was done with a repro weatherstrip from Dan? Carpenter. Is that the best available repro? I can see why Kelly had trouble getting the molding on. Looks like it stands proud of the panels a little. I can't wait for the fun of trying to do this with actual goop on the gasket...What a mess that must make.

Looking in the trunk, here is the Dynacorn under window support, cut apart and patched to have the same number of pieces as the original.

Image


Image


I added the date code in the same spot as the original
Image
 
#49 ·
Man, this is awsome!

Makes me want to go out in the backyard right now and start prepping my car to do the same thing you have done. Great work, and a great inspiration to the rest of us with projects that need to get off the ground.

We bought this car in June 1998, and it was supposed to be a high school graduation gift for my daughter in 2000. Due to circumstances beyond our control, the car is still in this condition today.
 

Attachments

#54 ·
This build thread was started years after I started on the car, so here is the story of the doors, from my door thread....

I had 5 used doors and 4 repro doors to choose from.

If I had a magic wand, and could combine parts of the used doors, I would have been in good shape. They all had issues where the interior 'grain" is, so I didn't know how I could weld them up and recreate the grain.

Of the repro doors, one pair had the exact look of the factory grain, but less pronounced. I'm not sure how I'd could scuff them, let alone prime and paint them without washing out the grain.

The importer of the other repro doors says his grain was chosen to eliminate that problem, and that if I had primed them, they'd look fine. But as they come the grain looks totally different. I sent them back.

Here are some pictures:

Factory grain, dipped door:
Image


Repro pair 1, same grain, but more subtle:
Image


Repro pair 2, different grain, supposedly looks the same primed:
Image


Picture from importer, showing one of the above doors primed:
Image
 
#55 · (Edited)
My used doors....

I could write about a 1000 words on each door. Most were either rusted on the bottom frame and or lower front frame corner, pretty complex places to fab patches. The door with the best frame I had was actually rusted through on the inside face about an inch below the door panel? Not sure how that happened.
Image


All the drivers doors I had are broken where the latch mounts. Not sure how to weld that up without ruining the grain there.

Of the repro doors with the correct grain, fit is ok and workable, except, I didn't know how to fix this?
Image


I also had this used door I "like", but the UPS man bent it in places that me, as a crappy bodyman, didn't know how to fix. especially near the door handle raised part? I'm good a fixing rust, but subtle hammer and dolly work is different.

Image

Image


This door was also completely broken where the bear claw latch screws in:
Image


But the bottom frame sure is nice!
Image


Image


Image


My original drivers door had latch issues,
Image


and handle issues:
Image


Ended up using the UPS damaged door and the rusted inner face door, here they are done,

I was going to use the repos with the good grain, but based on other posts on the board I thought I'd need to install the guts to make sure I could get the windows and vent windows to line up. BUT, my car shell has none of the side door molding in place and that stuff is somewhat problematic to take on and off repeatedly, so I'd have nothing to make sure the windows sealed against. Sure I could guess , but, it led me to trying with two of the best doors I had lying around.

After sand blasting, and poking with an awl, those doors weren't too good, but I soldiered on.

Drivers door


Passanger door, decided I could cut the back corner of another drivers door and make it the front corner of the passenger door


I think they will be rust free long after I depart, but maybe not.

I blasted them inside and out,. Poured epoxy into the door and rolled them around until it was oozing out the seams. Let them sit standing up so the epoxy dried thick in the bottom and on the inside of the front edge.

The I painted them. I used white epoxy so I can see in there when it becomes time to assemble them.


And, as much as I hate stink bugs, I feel bad for this one.