Vintage Mustang Forums banner

Welding Problems: How do I finish this?

6.1K views 72 replies 27 participants last post by  agb_abq  
#1 ·
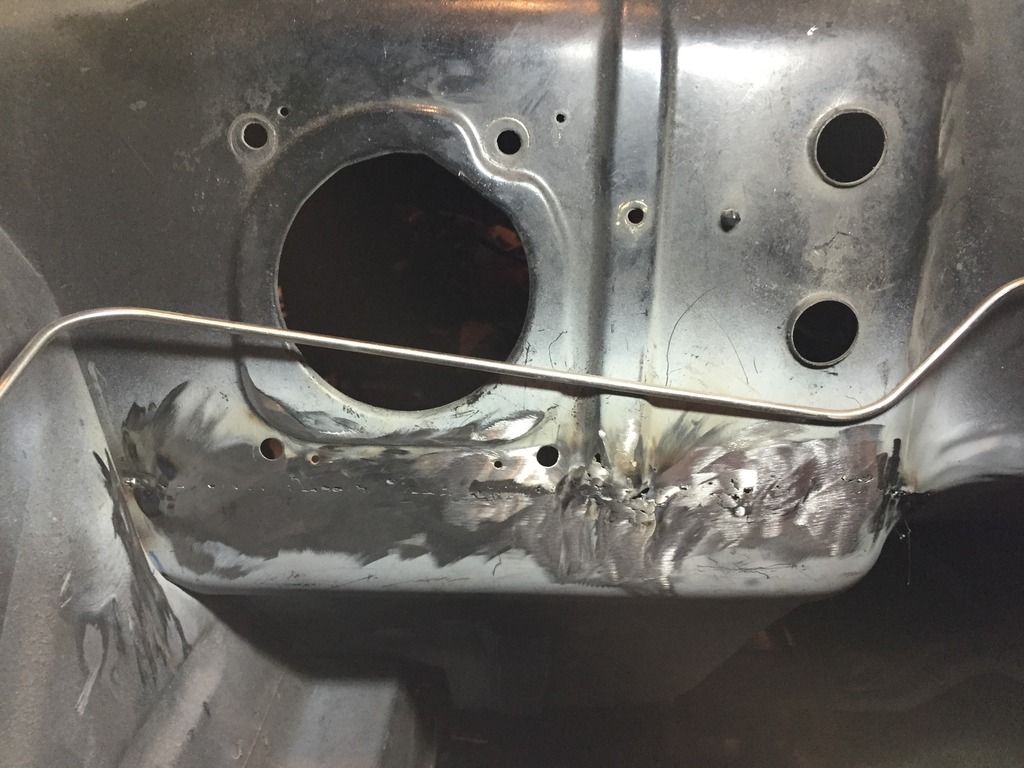
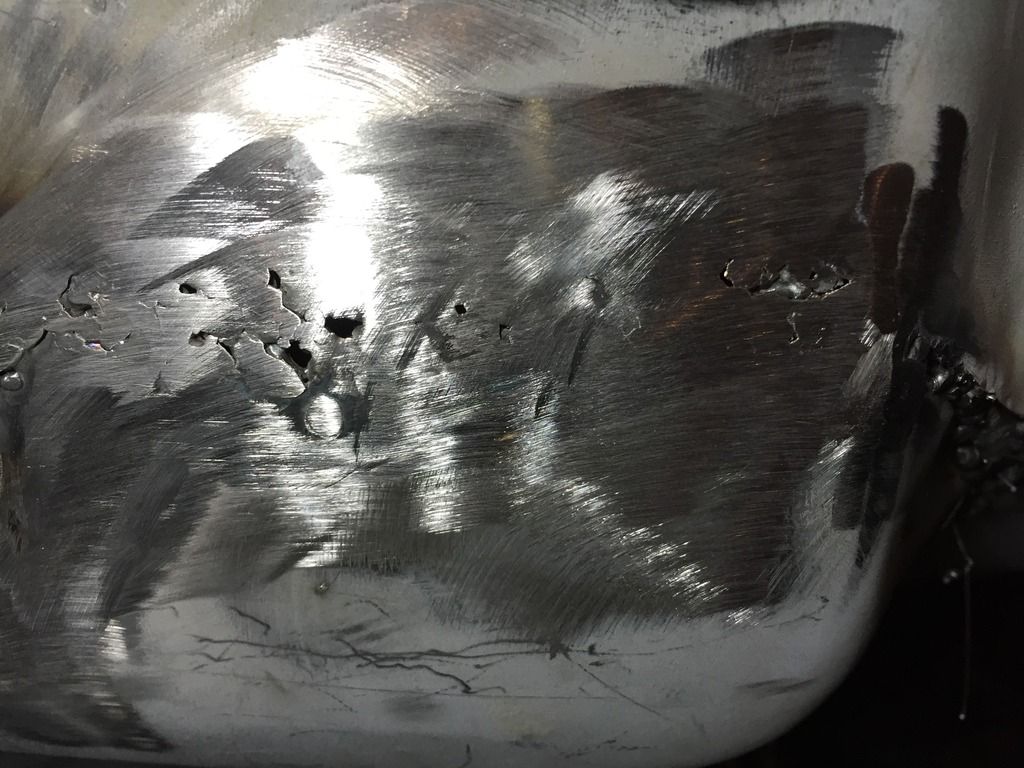
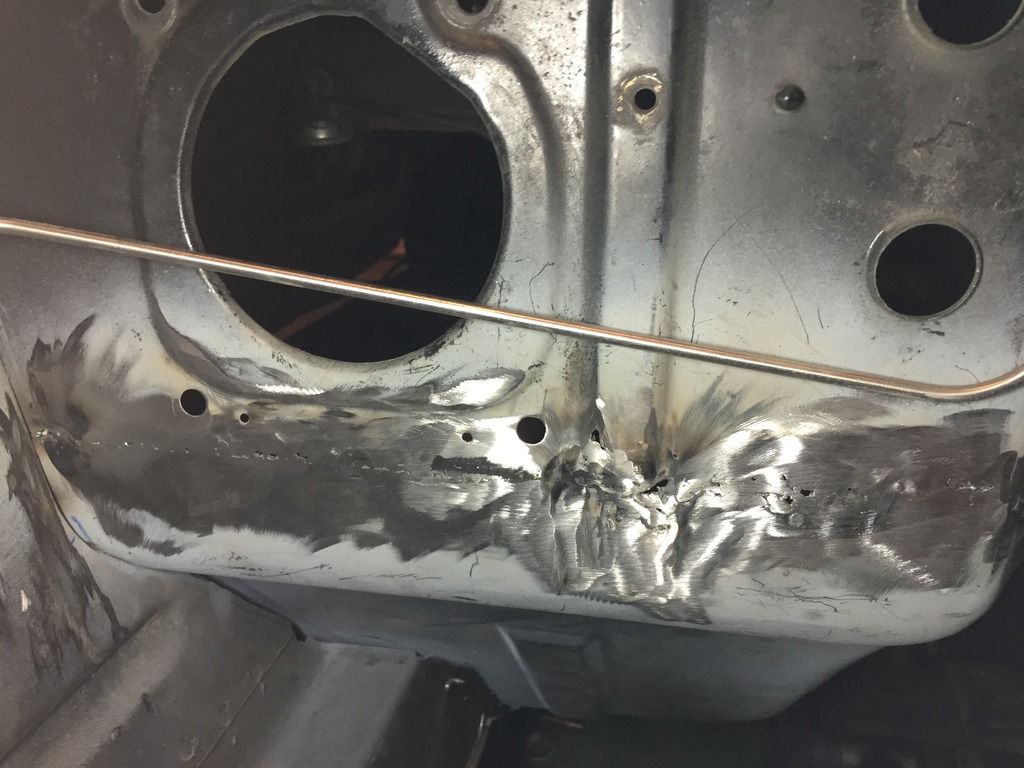
So a while back I started to cut out my rusty coupes floorboards and toe boards with the plan to replace them. I finally got to the point where I had a good gap all the way across and after a lot of practice I made a decent bead across it. My project has been all trial and error. It is for the sole purpose of teaching myself how to work on these cars. I tried to grind down the welds this past weekend with a 40 grit flap disc and a 60 grit flap disc and I made a bunch of pinholes and a few larger holes in my panels and in the welded area itself. Honestly I stink at welding but I am going to be taking a local welding class to improve my skills. I really want to know how to fill these welded holes I tried to weld them in but I blew through. Gas was set at around 20CFH. So I decided to either fill these holes with body solder or try some kind of filler, but Im not sure what to get. I don't ever plan on selling this car, it is not a show car, I just want to finish these holes and I have no idea how.


#2 ·
If it were me I would use a copper spoon or a piece of aluminum as a heat sink. It looks like you keep blowing through the metal. Using a spoon or heat sink as a backer will help minimize this. It would also be helpful to weld nice and slow. Letting it cool a bit between tacks to fill in the holes. You might well need a helper to hold the backer against the firewall as it needs to make contact as much as possible. What settings are you running on your welder, also what size wire?

Don't get discouraged, you can do it.
 
#3 ·
It will save you many headaches if you practice your weld on some scrap sheet first. When you can get solid welds with good penetration on the bench, they you're ready to try it on the car. Do some searches for similar questions, but a few quick comments; a flap disc is not the best tool for precise removal of the weld bead, you will also take surrounding metal. Use a small hard disc first. You have pin-holes because you didn't get good penetration with the initial welds, most new welders don't use enough heat. Don't use solder, with practice you well be able to fill them with the MIG, you can use a Copper backer if it helps you.

Show us some pictures of welds before grinding.
 
#4 ·
Back up the holes with copper or brass so the welding wire does not blow through.

I made a couple of back up pads with magnets to hold them in place while I plug welded some holes in my engine bay aprons.


#7 ·
Very cool DIY accessories
 
#6 ·
Also, when both sides of the panel are visible, check the back-side after you finish welding. You will be able to see any place where the weld didn't penetrate 100%, there should be no sign of the butt joint gap. Hit those spots from the other side before grinding. That gives you a nice thick heat-sink, so you can weld a bit hotter without fear of burning through.
 
#8 ·
Yup, spoon and short bursts to fill those areas. Had the same thing happen with mine, just takes practice.
 
#10 ·
Thanks you so much for all of the info thus far. I have a copper spoon but I am unable to hold it up while welding and I didn't have any help on hand when I was working. Those little copper magnet contraptions you put together are nifty. I am using a mig 140 and I am using Lincoln .025 wire, gas is set on 20CFH, and I adjust the setting frequently but usually around b and around 4. I just found a couple picture of before I started grinding hopefully this helps. I tried to fill them but I blew through and when I grind the knew welds Im afraid of making more holes. Here are the photos from before


#13 ·
I do the same. I use the hard discs until it's all but perfectly level then I swap over to a high grit flap disc.
 
#15 ·
Please avoid the temptation to cover it up with any sort of filler product. You can fix it properly, I promise you. And, the car deserves it.
 
#16 ·
Looking at how high your weld beads are, you need to turn up the heat. It's basically a series of tack-welds with sheet metal. By their nature, MIG welders start out "cold" for the first 1-2 Seconds, so you will be up 1 heat setting vs. a continuous bead. Watch some videos online, this is one good place:
Welding Tips and Tricks - TIG, MIG, Stick and a pantload of other info
 
#18 ·
One key point is, point the gun where you want the most heat to go. that means aim the gun at maybe a 45° angle towards the good, thicker metal. Even better, get some spot welds on solid metal, near the hole, then work towards the hole from that starting point. That blob of weld metal gives you some mass to absorb excess heat, aim the gun towards it. Take your time, the whole work piece heats up quickly, you have to jump around and take frequent breaks to let it cool. I'll often wait until I can put a bare hand on the steel before doing the next series of tacks. (careful doing this, use a gloved hand first !)
 
#21 ·
There may come a point where some areas get so "chewed up" it's better to cut in a new patch piece or strip back to some virgin steel. That gives you some clean margins to work with. Don't discount some bench practice on scrap, you play with different setting without fear of ruining anything.
 
#22 ·
What kind of welder are you using? I don't mean MIG. Brand and voltage? I own a 140 amp, 120 volt HTP MIG welder and on my work truck a 140 Lincoln 120 volt flux core. Nothing wrong with 120 volt welders other than they can be very sensitive to voltage drop though and will cause fits getting good welds.
 
#24 ·
Your welds seem to be sitting on top of the metal and not really penetrating - I think you've turned down the power too much - also when welding THIN sheet metal in a butt weld you're going to only tack it together in short bursts - not 'lay down a bead' on it - two main reasons: you'll blow through the metal by getting it too hot and you'll warp the sheet metal by getting it too hot in a small concentrated area.
 
#26 ·
You asked a question about using a filler......
1. take your class, then, make your decision
2. Or, look at a product called "Lab Metal" for filling shallow divots and small holes.
It's a tough metal product, that, can take the heat of powder coating too and machines nicely. I'v used this for filling and leveling rough areas too.

Good Luck...
 
#28 ·
I am using a eastwood mig 135. I dialed settings accordingly and didn't even think about adjusting them. I now realize that I did have very poor penetration. This is the only part of the patch panel that I have completely ground down is there any way to save the rest of the panel before I grind it down?
 
#31 ·
I'm going to say it's a 120 volt welder. This may not be the problem but just check anyway. Make sure you're not using a long extension cord as well as your circuit in your garage I use my 120volt welder on a #10 wire.

I have to agree with the others, practice, practice, practice. Have you tried to do short bursts? I mean just pull the trigger and release it right away?