

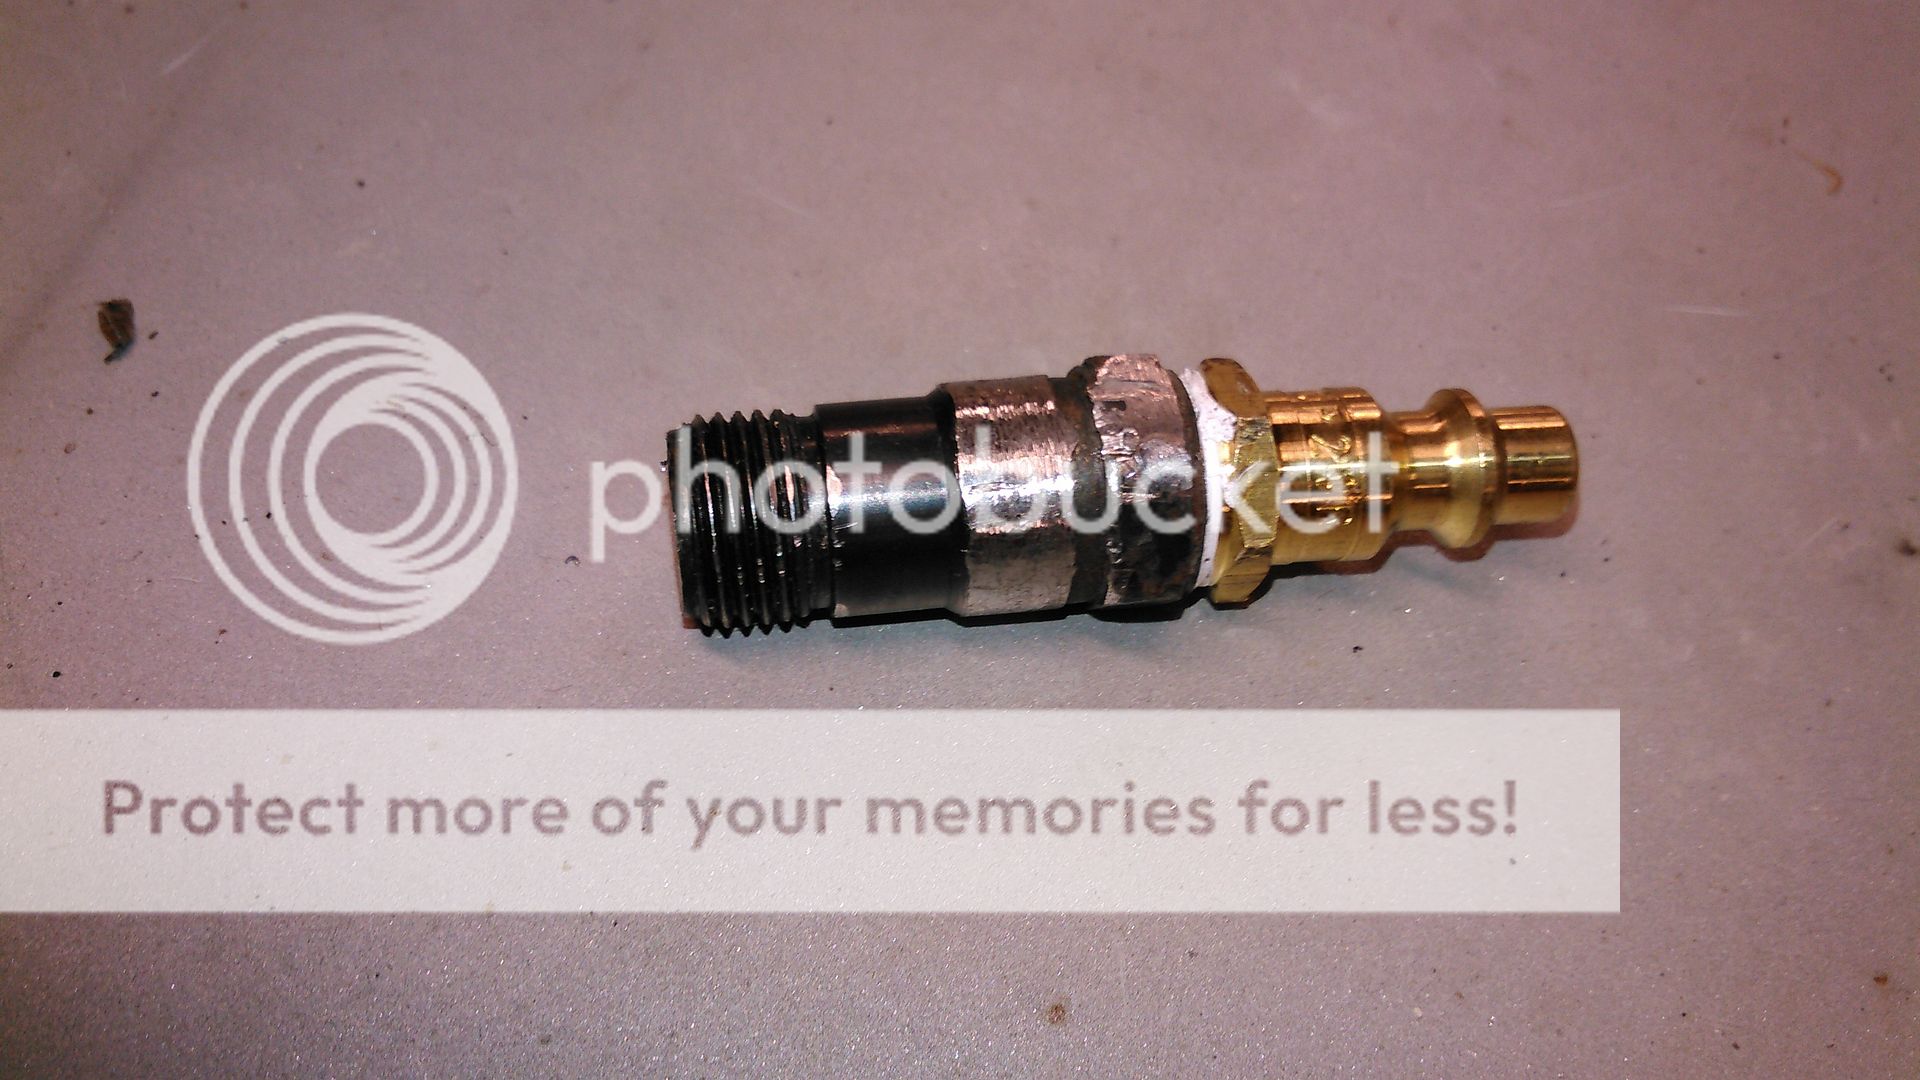
I used a kit from Alex's parts and a Proform valve spring micrometer. I thought I'd post the procedure. It's pretty straight forward. I used compressed air and a adapter made from a spark plug. I broke out the porcelain which was actually pretty tough! Once that was out, I used a 3/8" NPT tap which worked out great and threaded in an air chuck. This kit is good for 540" lift.
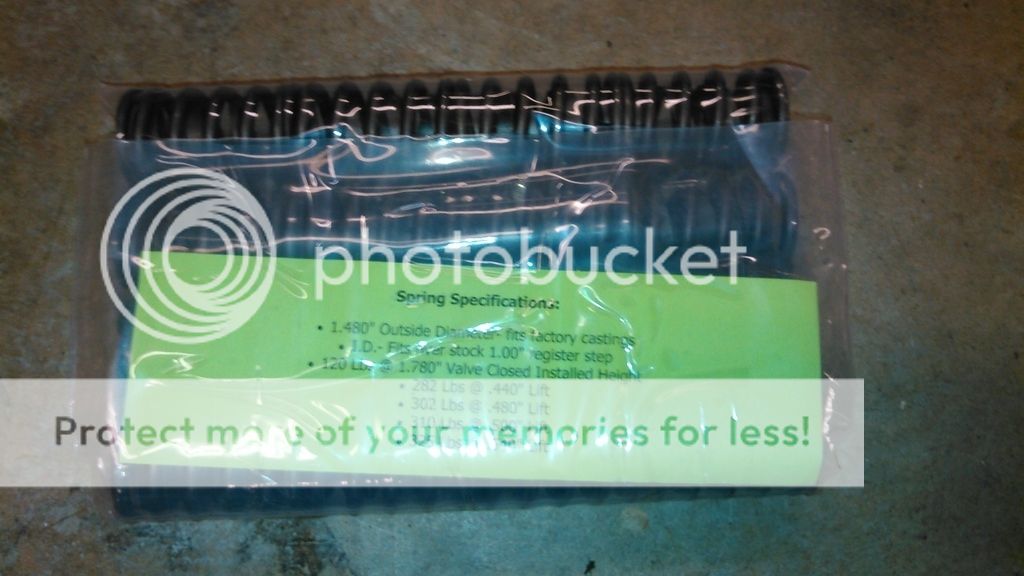
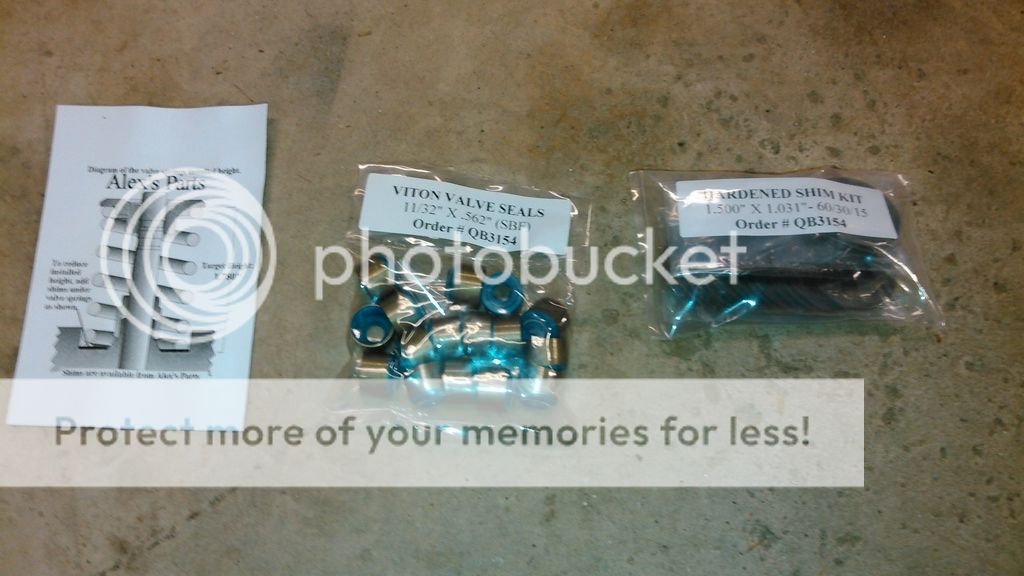
This is the kit. Along with the springs, retainers and keys, I ordered shims and Viton seals.

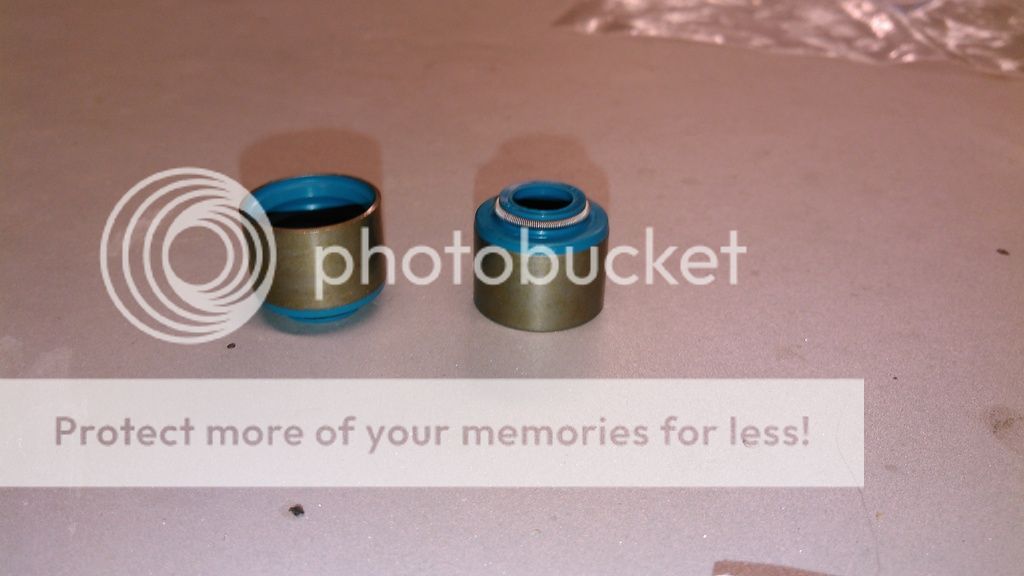
The seals
The problem with these heads the grove on the valve for the keepers is located lower then the intake, you can't use a conventional spring kit. The kits sold for this application either have a specific retainer or exhaust valve keys. The kit I used, the keys are specific for the exhaust valves. the LH key is the exhaust valve. They're color coded making it easy to quickly identify them. The exhaust are a light blue and the intakes are a light red.

Here is the Proform micrometer. It worked well enough and was accurate, I checked it with my calipers. What I didn't like was when it was zeroed on the .100", it looked like you pasted by .020", meaning the lines didn't match, more on that later.

Here is my VS compressor. You can tell it's old, made in USA, lol.

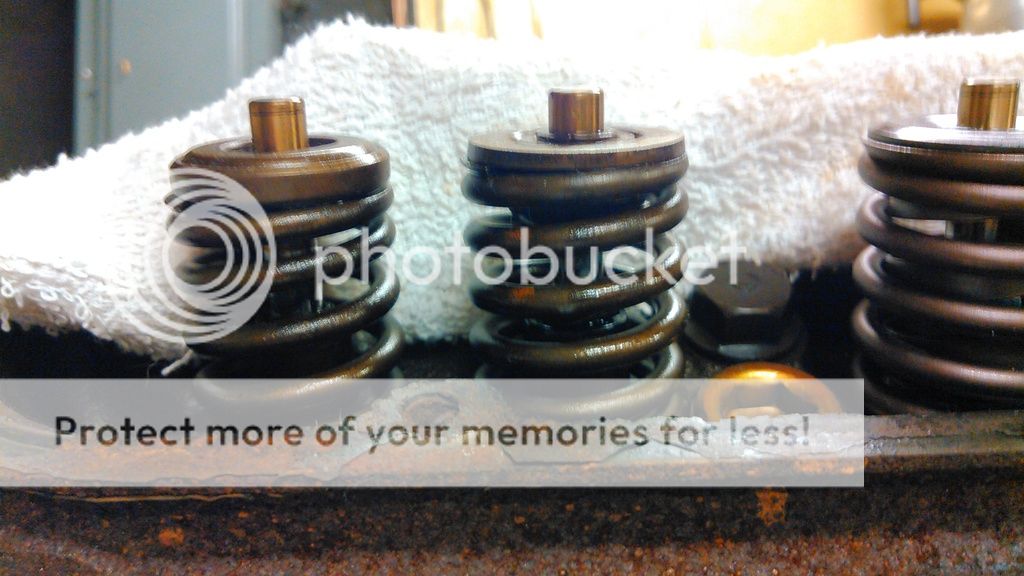
Here's what you start with. the exhaust valve is on the left, it's thicker up by the retainer due to the rotator.
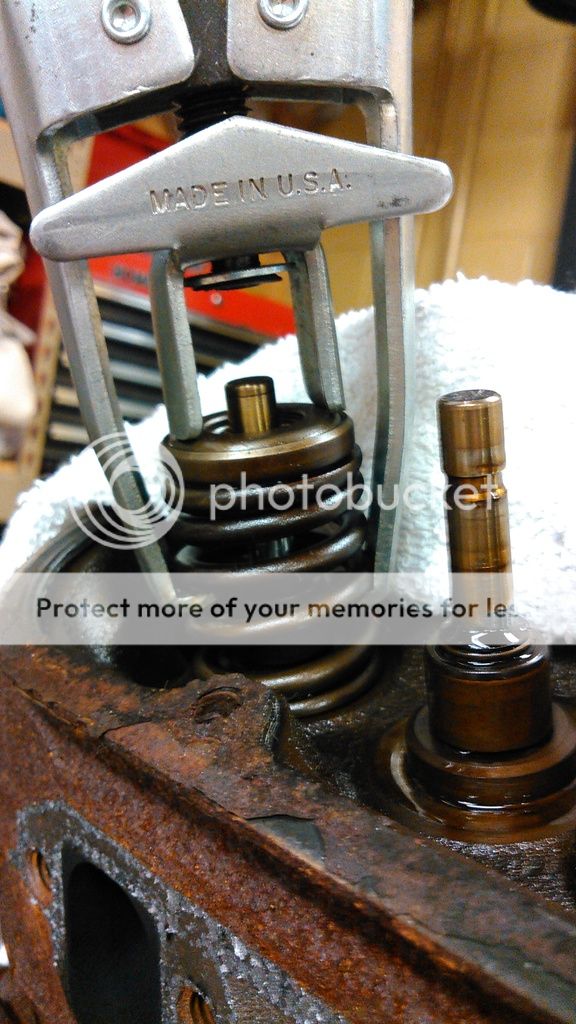
Compressing the spring. What I like about this style, it frees up your hands to install those pesky keepers. Once compressed, I used a magnetic wand to pull the keepers out. It was just easier that way.
Old springs off. You can see the old seals. Not sure if I have a picture installing the new seals. Pretty straight forward. Clean everything up, oil the stems and seals up and slide the new seals over the guides until they bottom out. If you look at the key grooves on the two valves, you will notice the groove on the exhaust valve on the left is lower then the groove on the intake valve on the right and why you need the different keys to use the same spring and retainer on both valves.

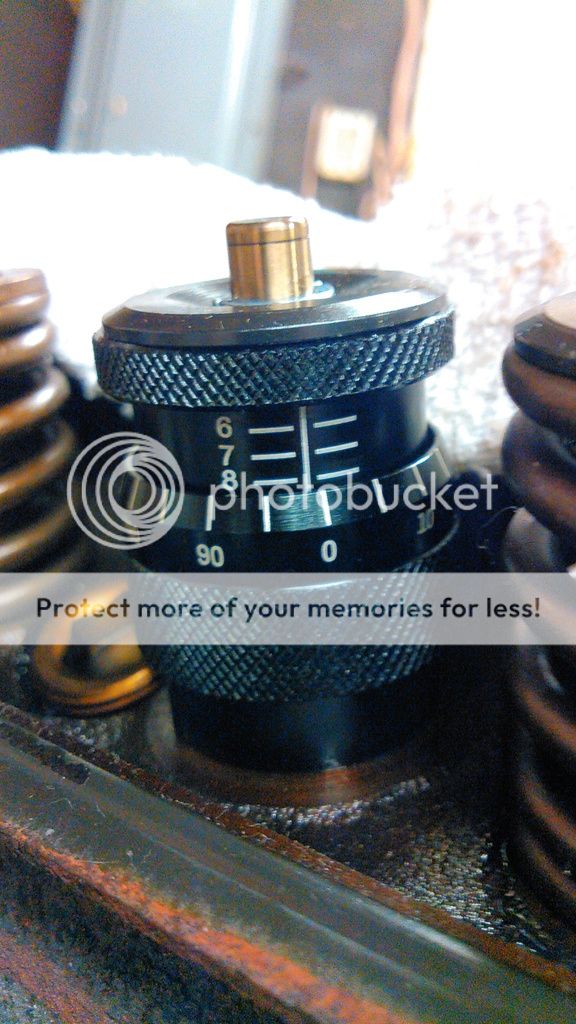
Next, install the micrometer, cap and keepers then expand the micrometer by turning the barrel. The reading is 1.800". This is what I was talking about. It looks like I went past 1.800" by about .020" but that is 1.800", all the zeros line up. target height is 1.780".
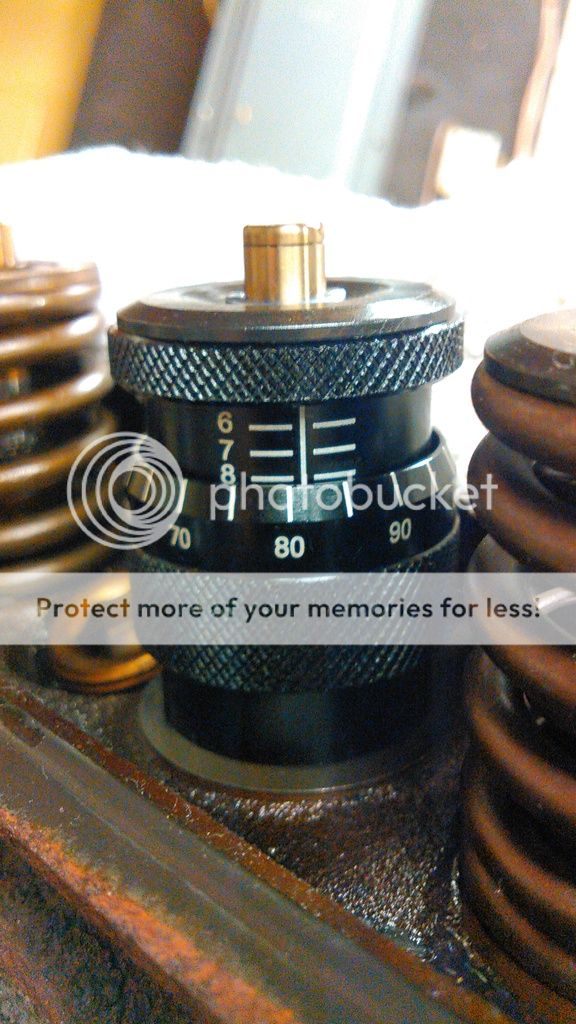
Next I installed a shim, just about perfect at 1.780"
I checked each and every valve. I have to say they were all pretty close. Some didn't need any shims and most needed a .020" to get it very close. I'm working off my cell phone camera and my work laptop since I dropped my laptop last week and broke the mother board so things may be a little short with photos. It wasn't too easy loading pictures.

This is the kit. Along with the springs, retainers and keys, I ordered shims and Viton seals.


The seals

The problem with these heads the grove on the valve for the keepers is located lower then the intake, you can't use a conventional spring kit. The kits sold for this application either have a specific retainer or exhaust valve keys. The kit I used, the keys are specific for the exhaust valves. the LH key is the exhaust valve. They're color coded making it easy to quickly identify them. The exhaust are a light blue and the intakes are a light red.

Here is the Proform micrometer. It worked well enough and was accurate, I checked it with my calipers. What I didn't like was when it was zeroed on the .100", it looked like you pasted by .020", meaning the lines didn't match, more on that later.

Here is my VS compressor. You can tell it's old, made in USA, lol.

Here's what you start with. the exhaust valve is on the left, it's thicker up by the retainer due to the rotator.

Compressing the spring. What I like about this style, it frees up your hands to install those pesky keepers. Once compressed, I used a magnetic wand to pull the keepers out. It was just easier that way.

Old springs off. You can see the old seals. Not sure if I have a picture installing the new seals. Pretty straight forward. Clean everything up, oil the stems and seals up and slide the new seals over the guides until they bottom out. If you look at the key grooves on the two valves, you will notice the groove on the exhaust valve on the left is lower then the groove on the intake valve on the right and why you need the different keys to use the same spring and retainer on both valves.

Next, install the micrometer, cap and keepers then expand the micrometer by turning the barrel. The reading is 1.800". This is what I was talking about. It looks like I went past 1.800" by about .020" but that is 1.800", all the zeros line up. target height is 1.780".

Next I installed a shim, just about perfect at 1.780"

I checked each and every valve. I have to say they were all pretty close. Some didn't need any shims and most needed a .020" to get it very close. I'm working off my cell phone camera and my work laptop since I dropped my laptop last week and broke the mother board so things may be a little short with photos. It wasn't too easy loading pictures.


