Vintage Mustang Forums banner

Trim Panel Fitting..or not fitting is more like it.

2 reading
1.9K views 16 replies 5 participants last post by  Dan Babb  
#1 ·
The trim panels I have are original to the car but the floor, rear wall and wheel houses are replacements. I got the car in pieces, so I don't know how well they fit originally.

I wanted to make sure the trim panels fit before I get to the point of spraying Lizard Skin on the interior and a couple of them aren't lining up.


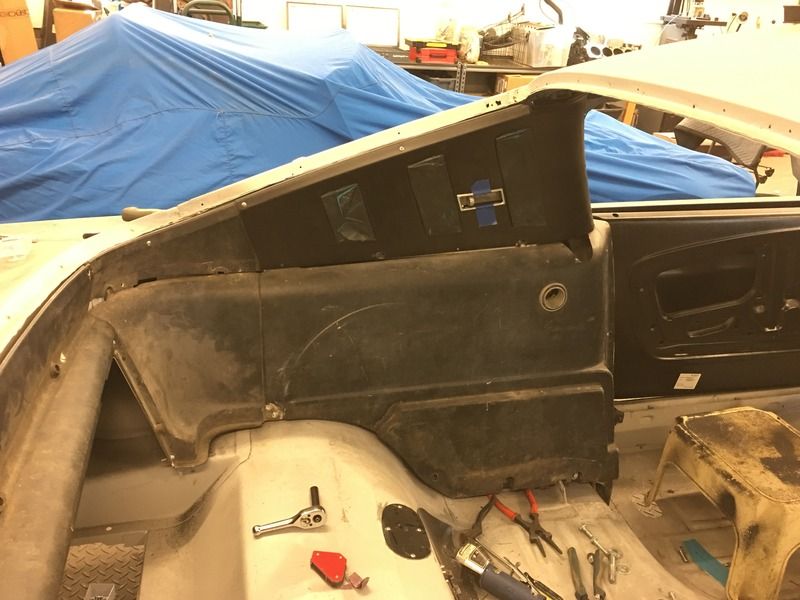
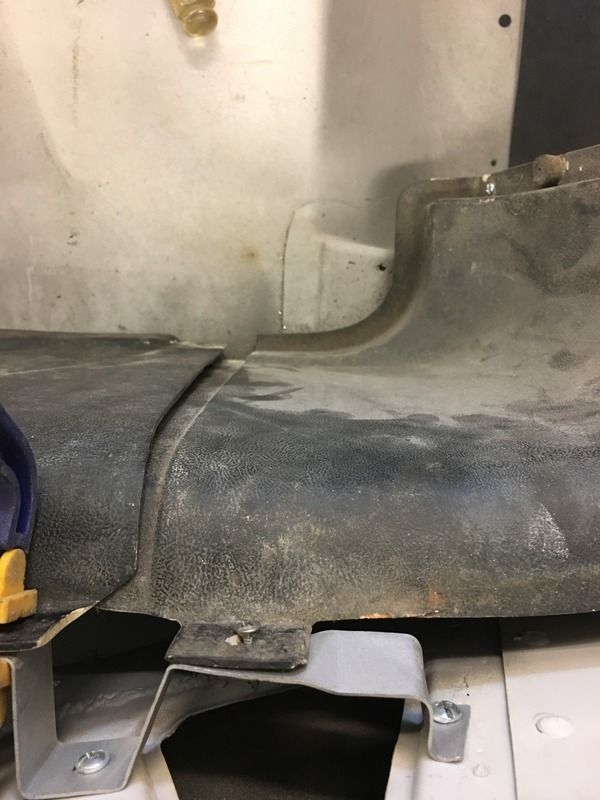
Passenger side quarter to the curved piece:

The quarter trim overlaps the curved section. I've trimmed away the front lower section of the quarter trim (to tilt it down a bit), but it's not enough.
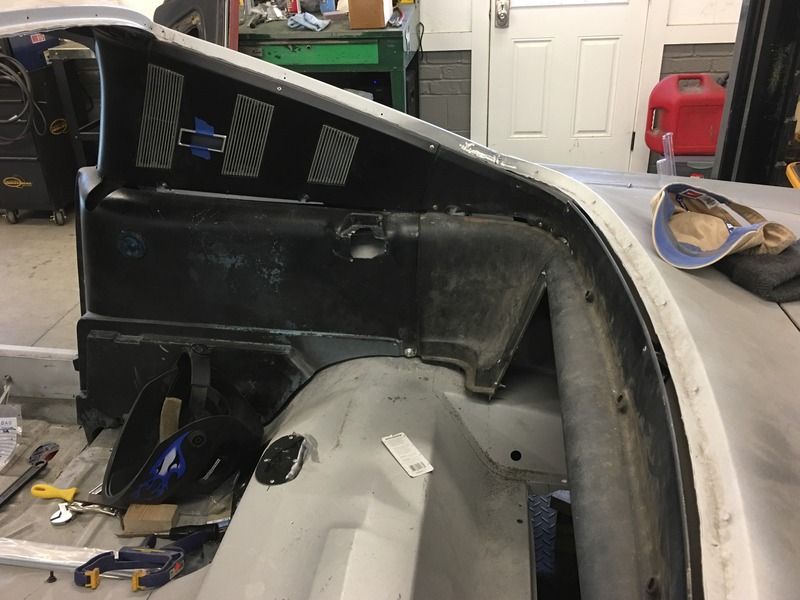
Top view:
Image


Image


I'm thinking I can use some tape to mark a line and then sand down the curved piece so the quarter trim lays flush...and not sitting on top of it. Thoughts?


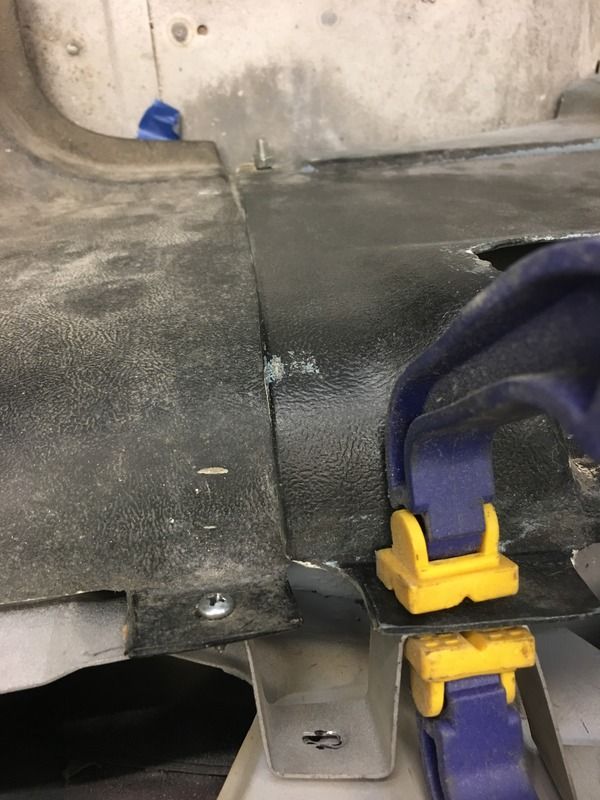
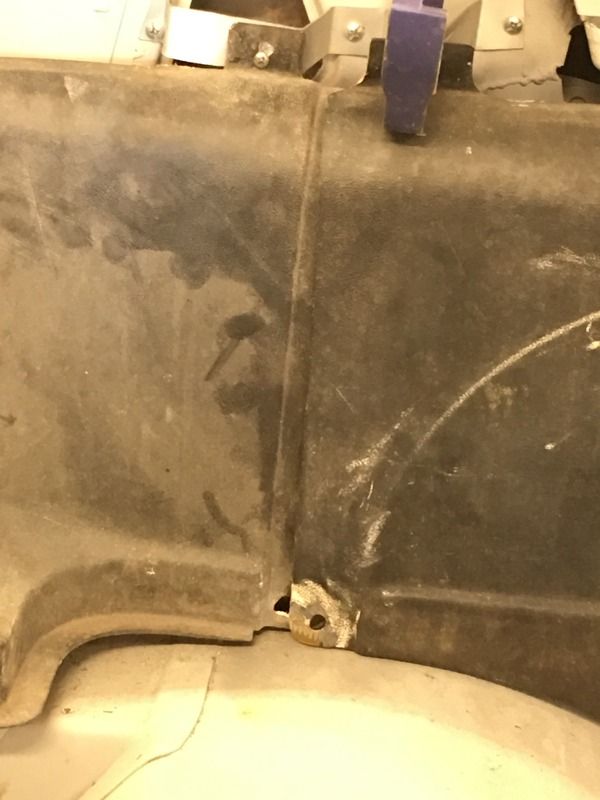
Driver Side (same pieces):

This side is worse. At the front where the quarter trim meets the door, the holes are lining up, so it's in the right spot there.

Image


Image


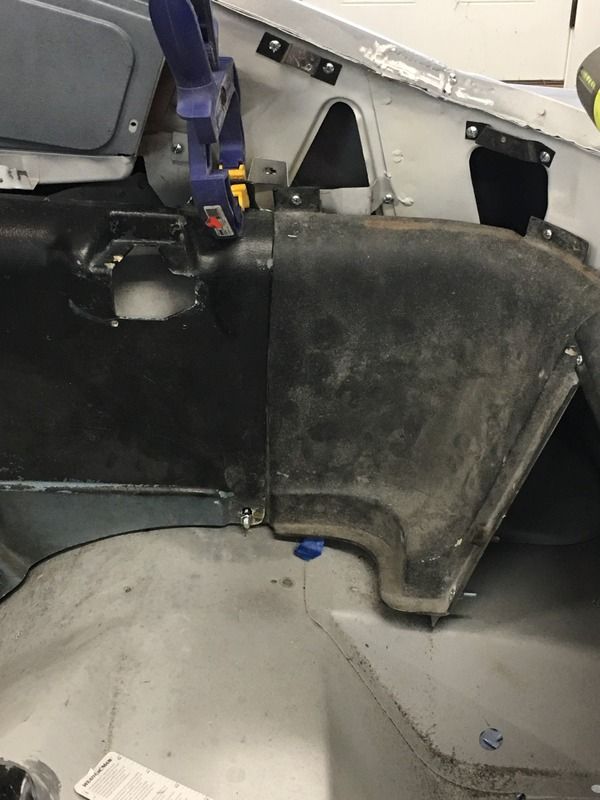
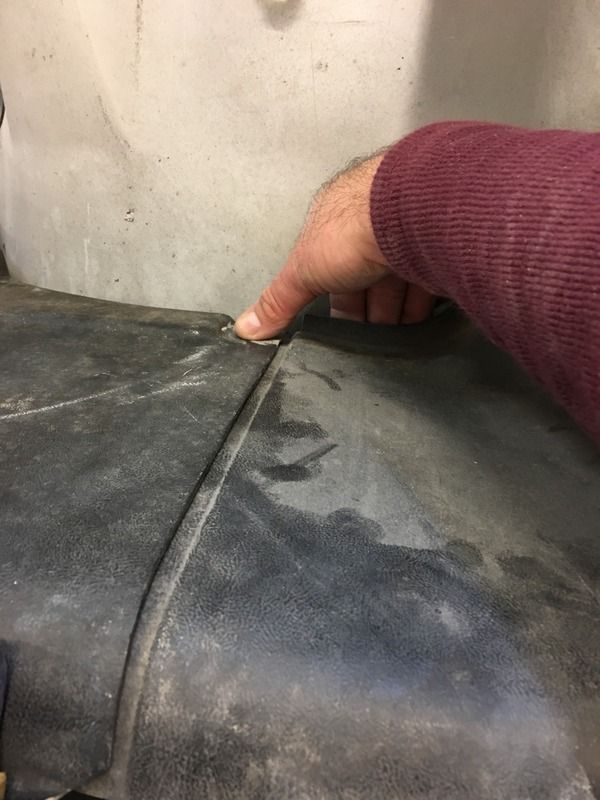
If I pull out at the bottom, I can get it closer. I may need to pull it out about a 1/2" or more to get it closer (but I doubt I will fill the whole gap.
Image


Also I'm going to use a rear-seat-delete cover...so not sure if pulling it out will interfere with the fit of that big panel.

How would you fix these issues?
 
#2 · (Edited)
Hey Dan. If it were me I'd screw (or maybe small velcro patch) those panels (not clamp, they'll get in the way) together so that they meet as designed, then set them in there (temp shims may be helpful here) so that intended horizontal/vertical lines are achieved and the front-most panel edges at the doors are within reach for windlace to cover. Then look at where the brackets need to be to meet up correctly and move/bend/twist/cut/drill the brackets as needed to conform. Do you have the seat delete panel handy? That should be trial fit as part of this little operation too.
 
#3 ·
Even when they aren't screwed in, I'm having a hard time getting them to sit in the right spot. Maybe that's because I have the rear panel screwed in place and it's not allowing the rear curved ones to move at all.

I do like the idea and can use some duct tape to hold the loose panels in place and see if that helps with bracket placement. May need to find a night when you're free and have you come by to help out.

Haven't ordered the delete panel yet...was going to do that soon and will definitely make it part of the mock-up. I'm going to use the one that has the recess for the rear tire, so I'll need to weld in some supports for the wheel to mount to.
 
#4 ·
Duct tape, of course. I've been running on a woozy 7 cylinders the last few days, post-dental visit medication doing what it does. Set it all aside until you get that panel. Are you going to fabricate your own supports for the spare wheel/tire? I need to do something along those lines too, can't place mine stock with how I've "re-engineered" my back seat/trunk area.
 
G
#5 ·
Dan I believe the fiberglass panels were drilled and screwed in on a car by car basis. Meaning, each could be slightly different. Point being, don't be shocked if drilling new holes is needed. The brackets can be installed differently too, meaning there could be some mounting play with them. You could also have one bent a bit, and you would hardly know. So leave them loose and get all of them in place.Once everything looks OK ( the tape idea is a good one ) then worry about drilling holes that may be needed to get them installed tightly. The rear seat delete is another item that may need a slight bit of fitting, so don't worry about it. I have the '66 style delete in my car and it went in with just a bit of fitting needed, as I remember. It was loooong ago.
 
#6 ·
Sometimes I guess you just need to walk away from it...get advice from here...and get back to it.

I loosened up the panels and adding in spacers on the bottom to get them to line up better. Looking closer and I'm probably just a washer or two (spacer width) away from getting them close enough.

Passenger side:
Image


Driver Side:
Image


Once I get them right, I'll make up some spacers the right width out of hard rubber and will glue them to the back of the panels so I don't have to mess with washers during final assembly.

I'll start messing with the top pieces tomorrow (and am expecting similar frustrations).
 
#8 ·
Looks good! PO of Jane used a paint stirring stick as a spacer on one of the trim panels.

Since the wreck, none of my trim has fit quite so well and it's probably because I had to grab quarter trim out of a different car. Maybe I should spend some time fudging around with spacers as well to get perfect fitment instead of just "close enough" some day :)
 
#9 ·
More progress. Most of the upper panels are going in OK. Just a bit of opening up the screw holes on the panel to give a bit of room for them to slide over is all that's been needed.

Image


Image


Discovered that I'm missing the molding that goes between the upper & lower panels on the passenger side. The hunt begins for that part.

Also missing the piece that fills the gap between the two moldings in the rear center, but I found that available online and I need the two pieces trim panel sections that go along the roof.

How much of a gap does the windlace that goes along the upper edge of the door fill in?

On the passenger side, the upper piece fits well.
Image


But on the driver side, I have a 3/8" gap. I guess I can do some surgery to the new bracket that is mounts too (it sticks out too far), but need to know how tight I need to make the gap.
Image
 
#11 ·
Discovered that I'm missing the molding that goes between the upper & lower panels on the passenger side. The hunt begins for that part.
The only piece of the 1" wide molding that is repopped is that small center piece. For the 4 longer pieces you will need to go to Fleabay and they're about $100 each. Here's the piece you need but it's for a very early fastback that used the small caps on the end.
1965 1966 Mustang GT Shelby ORIG FASTBACK INTERIOR RH QUARTER SAIL TRIM MOLDING | eBay

I need the two pieces trim panel sections that go along the roof.
1965 1966 Shelby Mustang Fastback Interior Metal Headliner Panels "Original" | eBay

How much of a gap does the windlace that goes along the upper edge of the door fill in?
Not very much at all.
 
#17 ·
Bringing this one back for more feedback from you guys.

Got my rear seat delete today. It looks good and fits great toward the front.
Image


Because I had to space out the bottom of the panels in the back, it doesn't slide back all the way.
You can see in these pictures how the spacers bulge out the panels...didn't really notice how much until I set this in today.

Looking down through the back window
Image


Image


I couldn't find a better way to get the panels to fit right and close up the gaps between them (other than putting spacers behind them on the bottom), so my only option seems to be to sand down the edges of the delete panel till it slides back.

Anyone have a better idea?